How to Properly Create a Hanging Indent in Word for Professional Documents
How to Properly Create a Hanging Indent in Word for Professional Documents
Creating a **hanging indent in Word** is an essential skill for crafting professional documents, especially in academic writing and formal reports. A hanging indent ensures that the first line of a paragraph aligns to the left margin while all subsequent lines are indented. This formatting is crucial for proper citation styles in bibliographies and reference lists. In this guide, we will explore detailed steps and tips on how to create a hanging indent, along with practical examples to demonstrate its application.
Understanding the Hanging Indent Feature
The **hanging indent feature** in Microsoft Word allows users to format paragraphs with specific indentation rules that enhance document readability and layout. Utilizing this feature effectively means understanding how to set up the **hanging indent margin settings** accurately. This feature is particularly useful for formatting references, making it easier to identify each source without strong left alignment for every line. This formatting style guides readers’ eyes, improving the overall reading experience.
Why Use a Hanging Indent?
One of the primary reasons for using a hanging indent is its prominence in citation formatting, especially in styles such as APA and MLA. For example, when creating a bibliography or reference list, a hanging indent visually distinguishes each entry. If you’re crafting a professional document, employing a hanging indent ensures your citations are clear and properly formatted. Additionally, it can effectively manage long lists, making them more digestible for the reader and enhancing the aesthetics of the document.
Accessing Indent Options in Word
To create a hanging indent in Word, you’ll engage with the Word indent tools available in the paragraph formatting section. Here’s how to access these options:
- Open your Microsoft Word document.
- Select the paragraph(s) you want to format.
- Navigate to the “Home” tab on the ribbon.
- Click on the small arrow in the bottom right corner of the “Paragraph” group to open the dialog box.
In this dialog box, you have various formatting options, including customizing your hanging indent. Understanding these settings is critical to applying a hanging indent correctly.
Practical Example of Creating a Hanging Indent
To help you visualize the process of applying a **hanging indent in Word**, follow this step-by-step tutorial:
- First, highlight the text you want to format.
- Open the paragraph settings dialog as explained earlier.
- In the “Indentation” section, find the “Special” dropdown menu and select “Hanging.”
- Set the measurement for the indent (the standard is usually 0.5 inches) in the box next to it.
- Click “OK” to apply the settings.
This method will format your selected paragraphs with a hanging indent, enhancing both the appearance and clarity of your document.
Adjusting Hanging Indents Easily
Once you understand the basics of creating a **hanging indent**, you may want to know how to adjust it according to your preferences. Word offers tools to customize and effectively manage your indents, ensuring your document layout stays consistent and professional.
Using Shortcut Keys for Quick Access
If you frequently use **hanging indents**, learning the shortcut keys can save time. You can quickly set a hanging indent using the following method: select your text, then press “Ctrl + T.” This shortcut will shift your indent into the hanging position, enhancing your document formatting swiftly without navigating through menus.
Formatting with Hanging Indents
While the hanging indent feature enhances the clarity of your paragraphs, it’s also essential to consider how it works within the broader scope of **Word document formatting**. Uniformity in your formatting choices contributes to a professional finish. When formatting lists, for instance, consider implementing hanging indents to navigate items clearly, making your text presentation more user-friendly.
Creating a Professional Bibliography
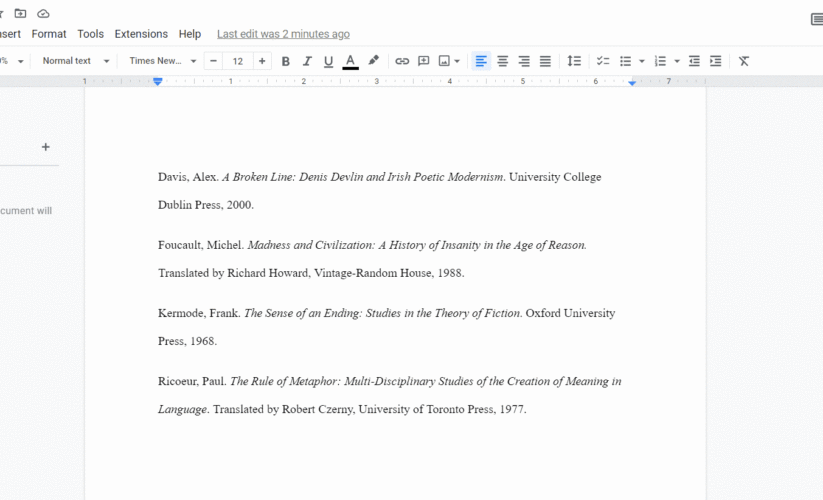
When compiling a bibliography, applying a hanging indent is particularly important. Academic papers often require a specific citation style, and using a hanging indent helps in maintaining the standards set by such styles. For instance, when referencing multiple sources, having them aligned this way allows readers to quickly scan and locate specific entries, thereby improving navigation through your document. Make sure to adjust margins and spacing consistently across all citations to achieve a polished finish.
Master Formatting Techniques in Microsoft Word
In addition to mastering the **hanging indent for bibliography**, getting familiar with various Word formatting options will undoubtedly enhance your document creation skills. The better you are at managing text layout in Word, the more professional your documents will appear.
Exploring Indentation Types in Word
Understanding different types of indentations is crucial when you’re setting up your document. Besides hanging indents, Word allows you to create standard indents and first-line indents, each serving specific formatting needs. Regularly switching between these indentations based on the context gives your document a versatile look and improves overall readership.
Hanging Indent Best Practices
Applying the hanging indent feature comes with best practices worthy of noting. Ensure that you consistently apply the same indent setting across similar paragraphs, maintain uniform font size and type, and consider using bullet points for lists with hanging indents for better readability. These practices create a more cohesive document structure that aligns with professional standards.
Final Touches on Document Formatting
After applying all necessary formatting, revising your document to ensure consistent indents throughout is essential. Small discrepancies in indentation can distract readers, so double-check that all paragraphs align with your chosen settings. Ta da! A well-structured document with hanging indents strengthens your presentation’s professionalism.
Key Takeaways
- Understand the importance of hanging indents for clear citation formats.
- Learn how to quickly access and modify paragraphs using Word indent tools.
- Employ shortcut keys for faster formatting options.
- Consistency is key in document presentation for professional contexts.
- Remember best practices when implementing hanging indents for better readability.
FAQ
1. How do I set a hanging indent in Word quickly?
You can set a hanging indent quickly by selecting your paragraph, then using the shortcut “Ctrl + T.” This will instantly adjust the selected paragraph into the hanging format, making it easier to manage your document layouts effortlessly.
2. What are the advantages of using a hanging indent?
Using a hanging indent enhances the visibility of citations and lists, facilitating easier navigation through sources in a bibliography or reference page. It also improves document readability, allowing readers to engage more effectively with the organized content.
3. Can I customize the margin settings for hanging indents?
Yes, you can customize margin settings for hanging indents. Navigate to the paragraph settings dialog, and adjust the indentation measurements according to your preferences, ensuring it aligns with your document’s overall formatting style.
4. How does a hanging indent differ from a regular indent?
A hanging indent applies to a paragraph where the first line is flush with the left margin, and subsequent lines are indented. In contrast, a regular indent applies the same indentation to all lines of the paragraph, affecting overall paragraph alignment and appearance.
5. What types of documents benefit from hanging indents?
Documents that rely heavily on citations, such as academic papers, research reports, and professional bibliographies, significantly benefit from hanging indents. They help maintain clear distinctions between individual entries in a reference list, enhancing overall document clarity.
6. Is there a difference in formatting hanging indents for different citation styles?
Yes, different citation styles (like APA, MLA, or Chicago) have specific requirements for how hanging indents should appear. Always refer to the official guidelines of the style you are using to ensure compliance with formatting standards.
7. Can I create hanging indents for lists in Word?
Absolutely! Incorporating hanging indents for lists can help maintain a clean presentation, making it easier for readers to engage with significant points within your document. Just apply the same hanging indent steps to your list items and observe the difference in clarity.